This chapter is your tour of the screen: what every region does, how to make room when you need it, and how the tool keeps your work safe. By the end you'll know where everything lives and the handful of shortcuts that make the editor feel fast.
01What you're looking at
The editor has five regions, and each one answers a different question:
- Top bar — the main menu, your project's name and save state, the scene tools (Audio, Design check, Simulate, ✦ AI), the panel buttons, Preview and Export.
- Left panel — everything that exists in your scene: layers, variables, components, files and icons.
- Canvas — where you draw. The tool strip across the top holds the drawing tools, and its right half fills with options for what you selected (align, boolean, 3D). The small bar at the bottom right controls how you view the scene (zoom, grid, rulers…). When ✦ AI mode is on, a bar under the canvas makes images, video, sound and 3D.
- Right rail — details about what you've selected: Properties and Sentences — and, when ✦ AI mode is on, the ✦ AI tab.
- Timeline — the bottom strip where animation and scroll live.
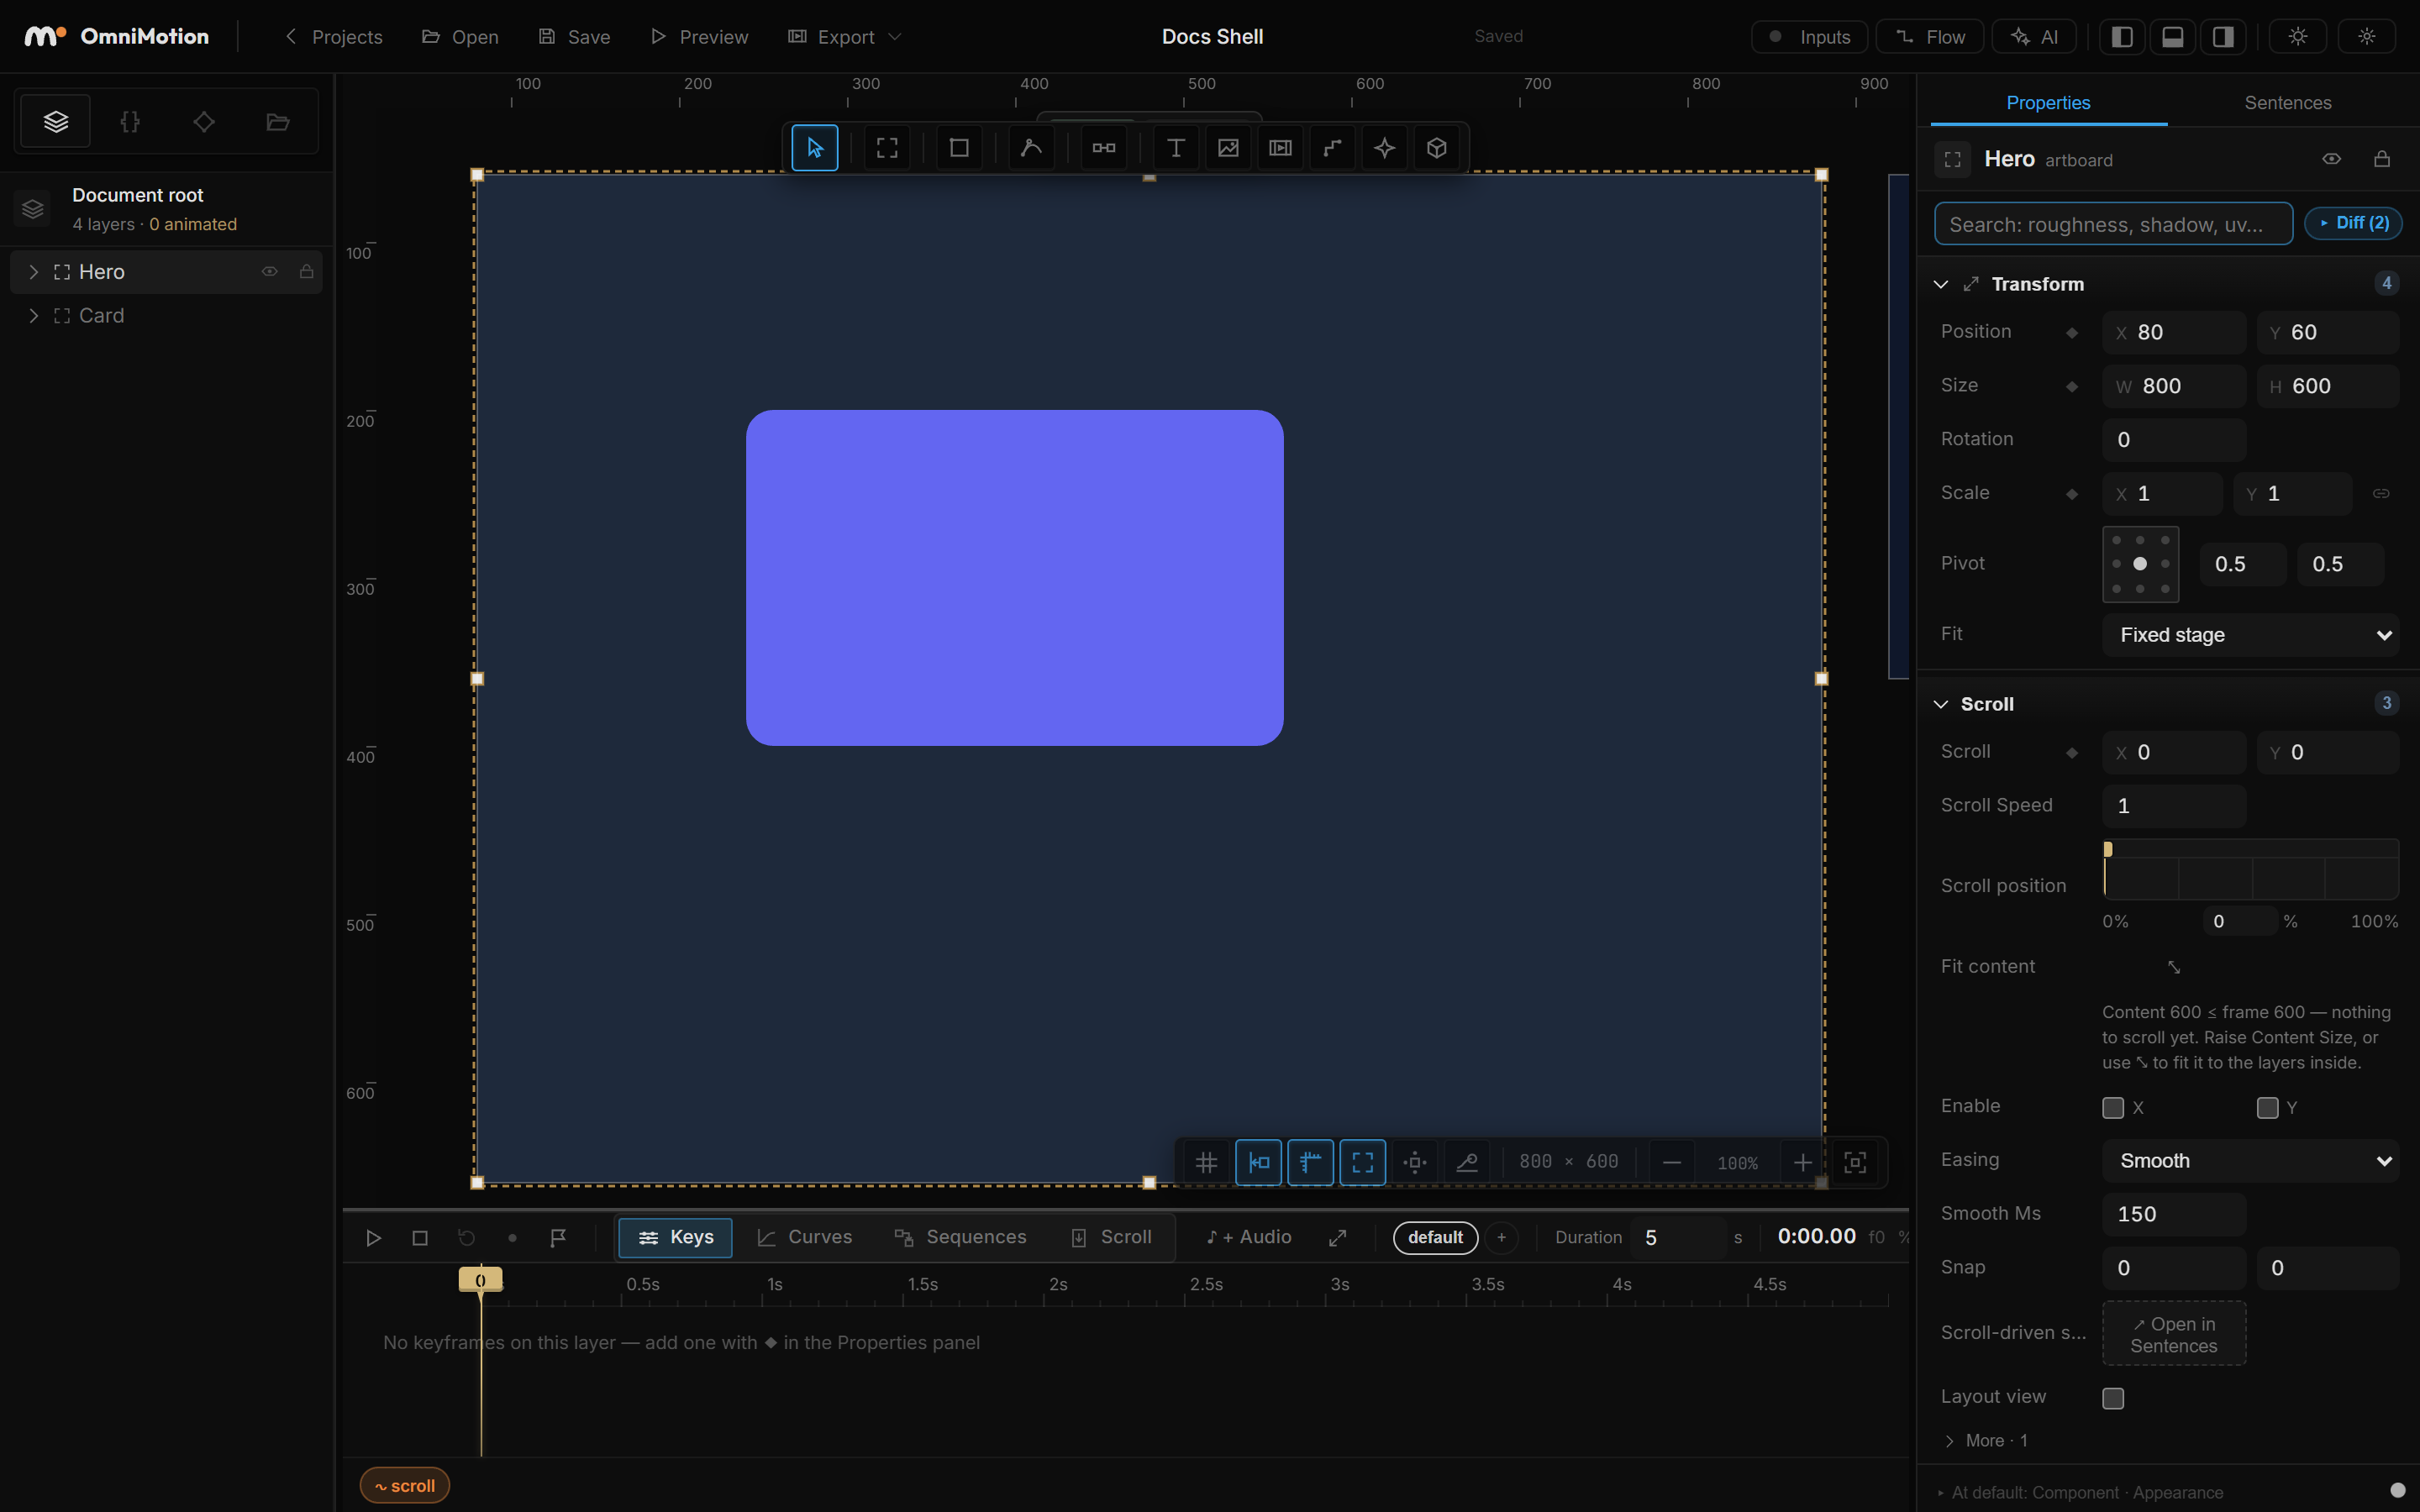
Your first look: the empty scene
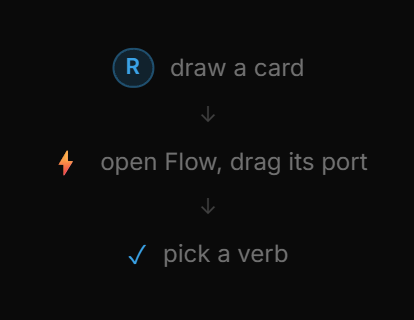
A new scene isn't a blank gray void — the canvas walks you through your first three moves: draw a card (R), add a sentence in Sentences, pick a verb. Draw anything and the hints get out of your way.
02The top bar
The top bar is built like a desktop app: a menu on the left, where you are in the middle, and the tools on the right. Most buttons are icons — hover one and the tooltip gives its name and shortcut.

Left — the menu and your files
Click OmniMotion ▾ for the main menu:
| Item | What it does |
|---|---|
| Back to projects | The Projects screen. Your project already holds its latest changes |
| Save (Ctrl+S) | Write this project in the browser. It does not download a file |
| Import file… | A .omni opens as a new project; an .html page becomes an artboard in this one |
| Import HTML… | Paste code or pick an .html file — it becomes an editable artboard. See Importing HTML |
| Copy link | Copies a link that opens this project in this browser |
| Light theme / Dark theme | Switch the theme. Your choice is remembered |
| Settings (Ctrl+,) | Opens Settings |
The four icons next to the menu are the everyday ones: Projects, Import file…, Import HTML… and Save. A small dot on the Save icon means there are unsaved changes.
You can also drop an .html file straight onto the canvas — the drop hint reads .html becomes an artboard.
Center — where you are
A breadcrumb: Projects / your project name. Click Projects to go back to the list. The name is editable — click it and type; it becomes the file name when you export a .omni. Next to it, a dot with Unsaved means a change hasn't been written to this project yet; Saved means it has.
Right — scene tools, panels, Preview and Export
| Button | What it does |
|---|---|
| Audio | The microphone and the timeline music you want analyzed — visuals can react to both. A dot on the icon lights while a source is live. Click for the popover with live meters and ▸ Analysis · master. See Microphone and analysis |
| Design check | Checks the scene for measurable design problems. See Design check |
| Simulate (Shift+P) | Runs interactions while you keep editing; the scene rewinds when you stop. The button reads Simulating while it runs. See Interactions |
| ✦ AI (Shift+S) | Opens the bar under the canvas that makes things, and the ✦ AI tab in the right rail. See The AI assistant |
| Panel buttons | Show or hide the layers panel, the timeline and the properties panel. See Making room |
| Performance | Frame time, speed and GPU information for this scene. See Performance |
| Preview | Opens the scene in the player, in a new tab. The artboard you have selected is the one that opens. See Preview & the player |
| Export ▾ | Project file (.omni), PNG image at 1x, 2x or 3x, SVG vector, Video (WebM) and Storyboard video…. See Export |
Design check and Simulate step aside while an artboard is in Play.
Design check
The Design check button (a check mark) looks over the whole scene the way a careful reviewer would, without AI. A warning-colored number on it counts problems to fix; a plain number, when there is nothing to fix, counts things to consider; no number means nothing measurable is wrong. The tooltip says the same in words.
Click it for the list, grouped by artboard. Each row says Fix or Consider, names the problem and explains it. Show layer selects that layer and brings it into view.
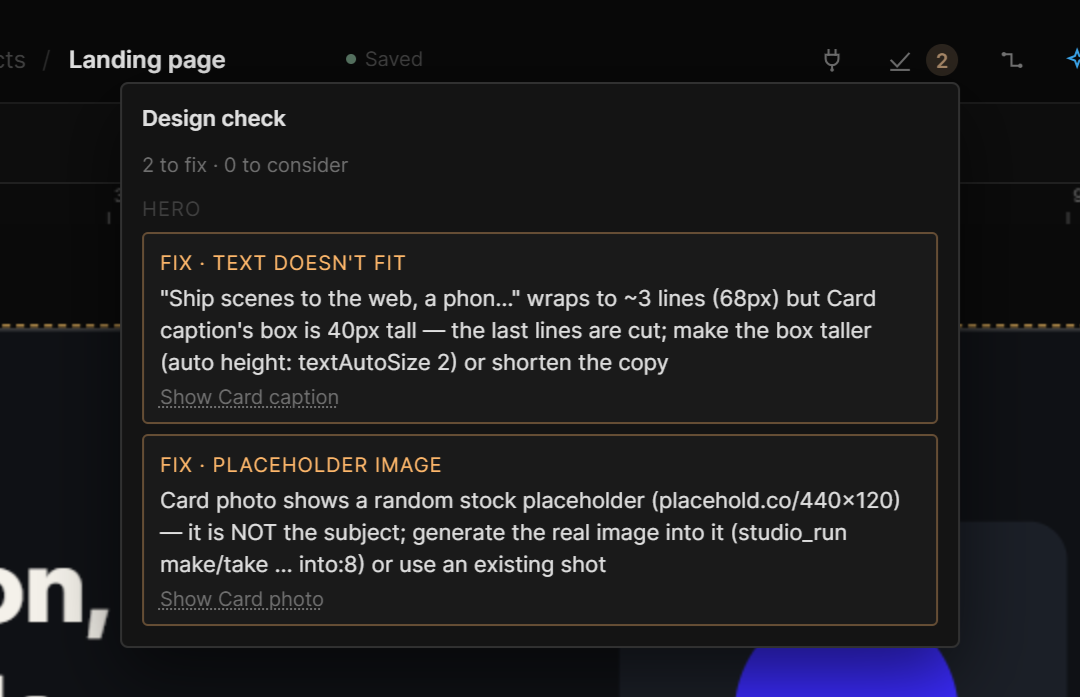
What it looks for:
| Area | Problems it names |
|---|---|
| Placement | Screens overlap, Off screen, Cut by the edge, Outside its group, Not on any screen, Almost aligned |
| Sources | Placeholder image, Empty frame, Placeholder text, Unused asset |
| Type | Font not loaded, Text doesn't fit, Texts overlap, Text covered by media, Content reads tiny, Too many typefaces, Headline too airy, Nothing leads |
| Motion and interaction | Animation does nothing, Interaction does nothing, Invisible at rest |
| Look | Unlit metal, Generic AI gradient |
The list refreshes a moment after you change the scene. It does not run while the timeline plays.
Performance
Performance (a gauge icon) opens a small readout for this scene on this machine:
- Frame — whether the engine is Active or Idle, updates and redraws per second, the Last frame time, and a bar showing how much of a 60 fps frame this scene uses.
- Free-run ceiling — press Measure to run the scene flat out for a moment. The result is the fastest this scene can go here.
- GPU — the graphics card the browser reports. If the browser is drawing without hardware acceleration, a warning says so, and How do I turn it on? gives the steps for your browser, with the settings address to Copy.
- 3D layer — Draw calls, Triangles and Textures, when the scene has a 3D layer.
03Settings
Settings in the main menu (or Ctrl+,, from the Projects screen too) opens Settings: one window for everything you can adjust about the tool. Sections on the left, rows on the right, a search box that finds a row by name.
| Section | What's there |
|---|---|
| General | Theme, autosave interval, language |
| Canvas | Grid, snap, rulers, physics colliders, Artboard edges, Layout grids, Motion handles, and whether Play starts paused |
| Panels & shortcuts | Which panels are open, whether Properties shows every section, the full shortcut list |
| AI & Generation | The model the Assistant starts with, the Design source, which provider Auto mode and the prompt ✨ enhancer use, and your Fal / Claude / Gemini / Stitch API keys |
| Account | Who you're signed in as, sign out |
| Storage | How much of the browser's storage your projects use, the crash-recovery slot, reset settings |
Every row carries a badge saying where the setting lives: This device (this browser only), Account (follows you), or Scene (saved in the file — those rows point you to the panel that edits them, like Inputs in the top bar).
API keys
AI & Generation has an API keys block: Fal, Claude, Gemini and Stitch (used only when Design source is Google Stitch). Paste a key, press Save (or Enter). The next generation or chat turn uses it — no restart. The field never shows the saved value; a hint reads Saved on this device. Forget removes that key.
Keys live in this browser only. They are not written into the project, autosave, or a .omni. Reset settings leaves them alone. Storage lists every secret name stored here (including keys used as secret:NAME in Data Source headers) with an × to forget one.
If a key is not set, generation falls back to the studio's shared key when that installation has one. On a hosted studio with none, paste yours here.
04The left panel — what's in your scene
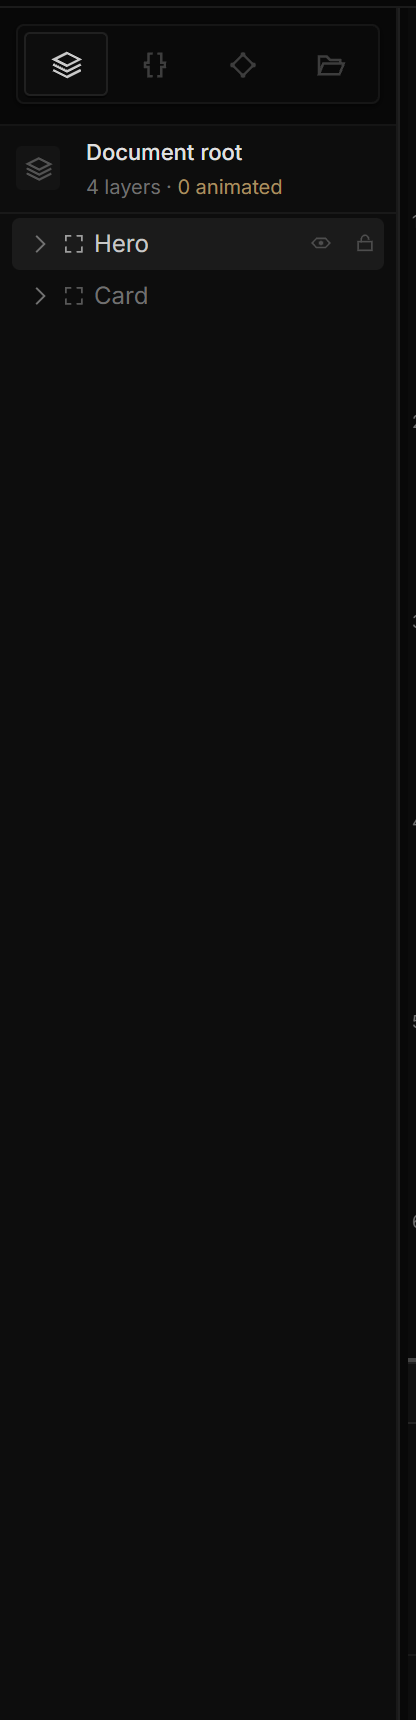
Four tabs along the top:
- Layers — the scene tree. The layer in front is at the top of the list, as in other design tools. Every row shows a small glyph for what it is; a text layer that still has its automatic name shows its words instead. Click to select, double-click a name to rename, and use the eye / lock icons that appear on hover to hide or protect a layer. Component masters and instances are drawn in purple; a hidden layer (or one inside a hidden parent) is dimmed.
- Variables — named values you can use in rules and expressions.
- Components — reusable pieces: a main component and its instances. See Components.
- Files — your imported assets (images, video, audio, models, fonts), and a second face, Icons, for placing icons from open icon sets. See Images & video.
Reorganizing layers is a plain drag: drop a layer onto a group or frame to nest it, or near the top or bottom edge of a row to place it before or after. Drag any row of a multi-selection and the whole selection moves, in order, as one undo step. A shape or text can't take children, so you can only drop above or below it. An invalid drop simply does nothing.
With the keyboard, once you click in the tree: ↑ / ↓ move the selection (Shift adds), → opens a group or steps into it, ← closes it or steps to the parent, Enter renames. Arrow keys here never nudge the layer on the canvas. Alt+click a row's arrow to open or close the whole branch; Collapse all sits next to the search field.
When a layer you select sits inside a closed group, the tree opens its parents so you can see it.
Tip: you can also paste an image or an image URL directly onto the canvas — the editor turns it into an image layer.
05The canvas
Drawing tools
The tool strip under the top bar holds the tools. Every tool with a shortcut shows it in its tooltip:

| Tool | Key | What it does |
|---|---|---|
| Select | V | Select, move, resize, rotate |
| Scale | K | Resize with content — font size, strokes, corners and shadows scale too |
| Artboard | A | Draw a page, or a frame inside one |
| Rectangle / Ellipse / Line / Pen | R / E / L / P | The Shape button is a flyout — hover it for Polygon and Star too. It shows the last shape you used |
| Bone | B | Draw a skeleton for rigged animation — click to place, keep clicking to grow the chain, Esc to finish |
| Text | T | Add text |
| Image | I | Place an image |
| Video | — | Place a video |
| Map | M | A live, styleable map layer |
| Effect layer | Shift+E | Applies a visual effect to everything below it |
| 3D scene | 3 | A real 3D scene inside your design |
After drawing a shape the editor returns you to Select, so you can immediately adjust what you made. (Bone is the exception — it stays active so you can keep growing the chain.)
The right half of the strip is for the selection: the align, distribute and boolean buttons when layers are selected (Drawing & layers), and the 3D tools when a 3D scene is in focus.
Hover tells you what a click would pick: a thin outline and the layer's name follow the pointer.
Right-click anywhere on the canvas for layer actions. The same menu works on rows in the layer tree. Its first line names what it acts on — the layer, or 3 layers.
| Item | Shortcut |
|---|---|
| Select layer ▸ — every layer under the pointer | — |
| Copy · Cut · Paste here · Paste in place · Duplicate | Ctrl+C · Ctrl+X · Ctrl+V · Ctrl+Shift+V · Ctrl+D |
| Copy / Paste as ▸ — Copy as PNG, Copy as SVG, Copy properties, Paste properties | — · — · Ctrl+Alt+C · Ctrl+Alt+V |
| Rename · Zoom to selection | F2 · Shift+2 |
| Group selection · Frame selection · Add auto layout · Ungroup | Ctrl+G · Ctrl+Alt+G · Shift+A · Ctrl+Shift+G |
| Create component (or the instance / main component actions) | Ctrl+Alt+K |
| Arrange ▸ — Bring to front · Bring forward · Send backward · Send to back | Ctrl+Shift+] · Ctrl+] · Ctrl+[ · Ctrl+Shift+[ |
| Align ▸ — Left · Horizontal centers · Right · Top · Vertical centers · Bottom · Distribute horizontally / vertically | Alt+A · Alt+H · Alt+D · Alt+W · Alt+V · Alt+S |
| Transform ▸ — Flip horizontal · Flip vertical · Rotate 90° right / left | Shift+H · Shift+V |
| Hide / Show · Lock / Unlock | Ctrl+Shift+H · Ctrl+Shift+L |
| Visibility ▸ — Hide others · Lock others · Show all · Unlock all | — |
| Add ▸ | Look · Motion · Repeat · Layout · Interact, then 3D / Rig — same catalog as Capabilities |
| Delete (or Delete 3 layers) | Del |
Hover a menu item for a one-line explanation. ✦ AI items appear only when they can act on what you clicked.
Right-click empty canvas for a shorter menu: Paste here, Paste in place, Select all, Zoom to fit, Show all, Unlock all, and switches for Layout grids, Rulers and Snap.
The view bar — how you look at the scene
Bottom-right of the canvas:

- Grid (G) — show the pixel grid and snap to it.
- Snap — align to guides and nearby layers while dragging. Hold
Ctrlmid-drag to temporarily ignore snapping. - Rulers — drag out of a ruler to place a guide.
- Artboard edges — a hairline around every artboard, so its bounds read even on a matching background.
- Motion handles — show the pivot point, axis arrows and rotation ring on the selection, for animation work. Off (the default), you get design handles only and can drag anywhere inside a shape to move it. See The transform handles.
- Halo (Tab) — float the selected layer's key parameters right next to it on the canvas, so small tweaks don't require a trip to the Properties panel.
- Physics colliders — outline physics bodies, when your scene uses physics.
- Readout — the cursor position (or a selected 3D object's position).
- Zoom —
Ctrl +/Ctrl -, click the percentage to jump back to 100% (Ctrl 0), or Fit everything (Shift+1).
None of these change your design — they only change how you're looking at it. Your view preferences are remembered between sessions. Layout grids has its own switch in the empty-canvas menu and Ctrl+Shift+4.
On-canvas controls
Select a page (an artboard at the top level), a component or an instance, and a small pill appears above it:
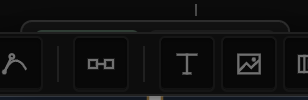
- Play — run this artboard live, right on the canvas: interactions respond, scrolling scrolls. Editing chrome gets out of the way while play mode is on.
- Master — mark the artboard as a main component. Once instances use it, the button locks; detach them first to turn it back into a frame. See Components.
A frame inside a page has no pill, so it never covers the design around it.
06The right rail — details of your selection
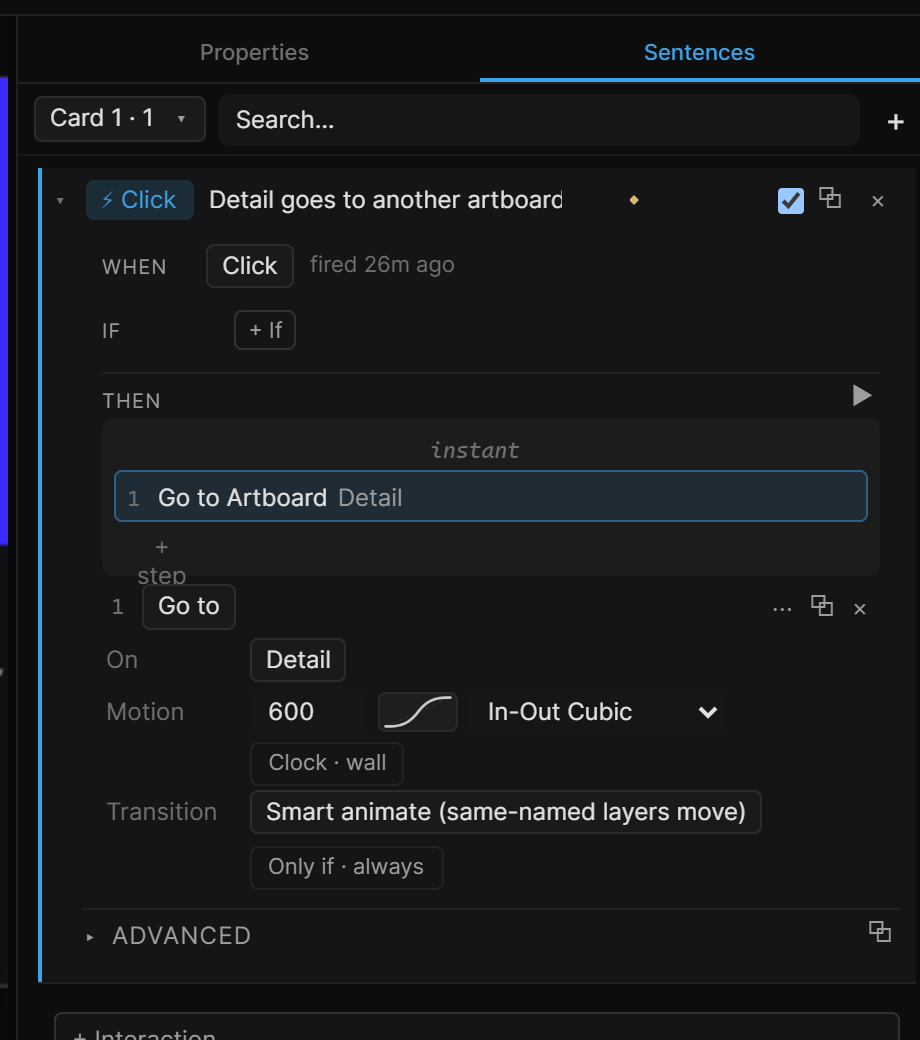
The right rail is tabbed. Properties shows everything about the selected layer; Sentences lists its interactions in plain language; when ✦ AI mode is on, a ✦ AI tab comes first — ask, act on the selection, and see everything AI made.
| Properties | Sentences |
|---|---|
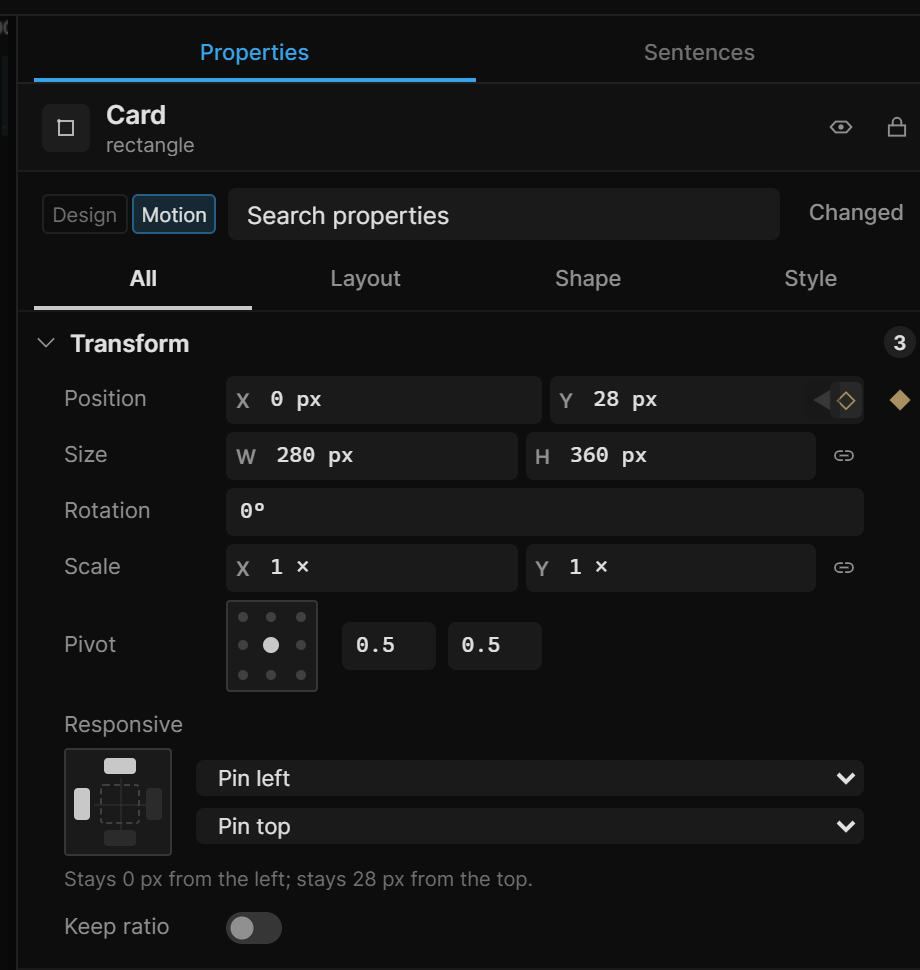 |  |
A few things worth noticing in Properties (the full story is Properties & styling):
- Design / Motion — Design (the default) keeps the panel to design rows; Motion adds keyframe badges, deform, interactions and physics.
- The search field jumps straight to any property — type "shadow" instead of scrolling.
- Changed shows only the sections that differ from their defaults.
- All · Layout · Shape · Style · Behavior narrow the panel to one kind of section.
- + Add at the bottom is where a layer grows new abilities: effects, layout, repeaters, physics and more.
Sentences reads every interaction as one plain-language row — "when tapped, play a sequence…" — with a detail editor beside it. Hover a row and the two layers it connects are outlined on the canvas, with a line between them.
07The timeline
The bottom strip is where time lives:
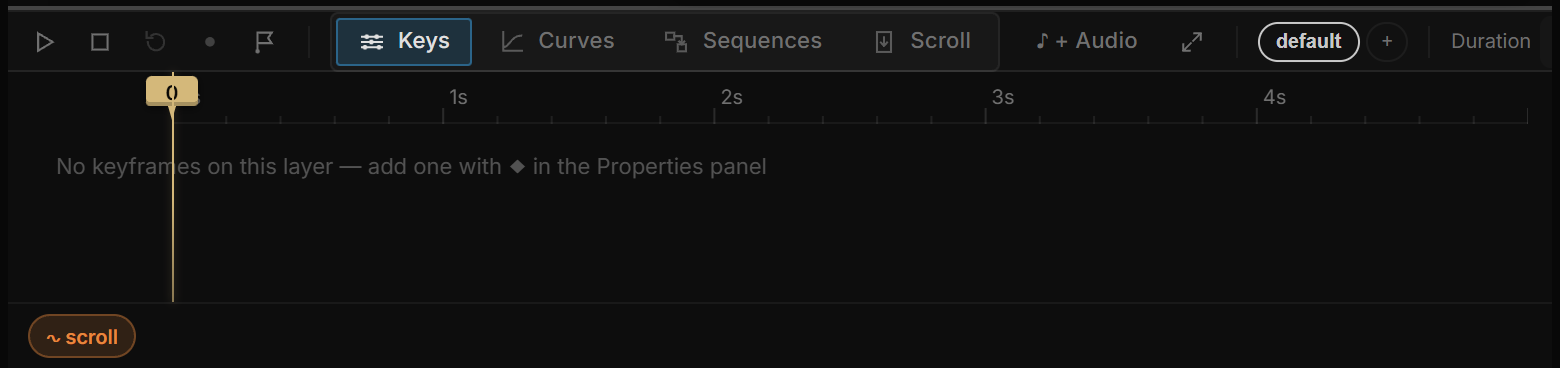
From left to right: play / stop, Auto Key, the marker button, the view tabs, ♪ + Audio, the current sequence (a named timeline — a scene can have many), the duration, and a readout of time · frame · zoom. Wheel to scrub the ruler, Alt+wheel to zoom, arrow keys to step one frame (Shift = 10), F to fit.
The view tabs are labeled: Keys (every keyframe on a time strip), Curves (the value over time, for shaping easing), Sequences (order, transitions and the graph of sequences) and Scroll (sections and snap points along an artboard's scroll). With ✦ AI mode on, a ✦ Storyboard tab joins them. Hover a tab for its one-line description. They are covered in Timeline & animation; the Scroll tab in Scroll participation, sections & snaps.
08Making room
The canvas is squeezed from three sides, and sometimes you want the space back. The three panel buttons in the top bar show or hide the layers panel, the timeline and the properties panel — a filled icon means the panel is shown, an outlined one means it is hidden. Hover a button and the tooltip names its shortcut:
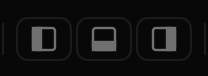
The same from the keyboard:
| Shortcut | Collapses |
|---|---|
| Ctrl+\ | Left panel |
| Ctrl+. | Right rail |
| Ctrl+/ | Timeline |
| Ctrl+Enter | Bring everything back |
A collapsed panel leaves a thin labeled strip at the edge — click it to reopen. You can never "lose" a panel.
To resize instead of collapse, drag the divider between a panel and the canvas.
The layout remembers you: collapsed panels stay collapsed next session.
09Your work is safe
- Autosave runs every few seconds in the background. If the browser crashes or you accidentally close the tab, the project holds the last autosave.
- Closing with unsaved changes pops a confirmation first.
- Importing a file over unsaved work asks first — and a broken file shows an error instead of a blank screen.
- Deleting shows a toast with an Undo button; Ctrl+Z works too, and a whole multi-layer delete is one step.
- Even if a panel crashes, the rest of the editor keeps working and your scene stays intact — a crashed area offers to save your scene before reloading.
- The tiny dot at the very bottom-right corner of the window is the engine's pulse: it breathes while the engine is working and rests when idle. If it's breathing, the tool is alive. For numbers, open Performance.
10Shortcut reference
| Tools | V select · K scale · A artboard · R rect · E ellipse · L line · P pen · B bone · T text · I image · M map · 3 3D · Shift+E effect |
| View | G grid · Tab halo · Ctrl +/- zoom · Ctrl 0 100% · Shift+1 fit all · Shift+2 fit selection · Ctrl+Shift+4 layout grids |
| Panels | Ctrl+\ layers · Ctrl+. properties · Ctrl+/ timeline · Ctrl+Enter restore all · or the three panel buttons in the top bar |
| Modes | Shift+P Simulate · Shift+S ✦ AI |
| Timeline | ←/→ step a frame (Shift ×10) · Home/End jump · F fit |
| File | Ctrl+S save this project · Ctrl+, Settings · Export → Project file (.omni) for another machine |
Shortcuts never fire while you're typing in a text field — renaming a layer won't accidentally close a panel. The full list, including selection, editing, 3D and the timeline, is Keyboard shortcuts — or press ? in the editor.