The timeline is where your scene gets a "when". This page covers keyframes, easing, the curve editor, the motion path on the canvas, the Motion check, flags, and sequences — the named timelines a scene can hold. Choreographing whole screens at once is on Choreography & the Motion tab.
01The transport
Everything starts from the strip at the top of the timeline panel:

- Play (or tap Space) and Stop and rewind. Holding Space pans the canvas instead; while you are typing, Space stays in the text.
- Reset scene — rewinds the scene to how it was before rules and physics ran. It lights up only when there is something to rewind.
- Auto Key — the red dot. While it is on, every change you make becomes a keyframe (see Auto Key).
- Add marker at playhead — drops a flag. Once it's there you can drag it, and right-click opens what you can do with it (Flags).
- The view tabs — the same timeline with labeled faces: Keys (every keyframe on a time strip), Curves (the value over time as a curve), Sequences (order, transitions and the graph) and Scroll (scroll sections and snap points — see Scroll participation, sections & snaps). With ✦ AI on, a fifth tab, Storyboard, appears (Shots and Storyboard). Hover a tab for its description.
- Fit view (F).
- Sequence chips — which named timeline you're editing, plus
+for a new one (Sequences). - Duration — how long the active sequence runs, in seconds. Drag it or click to type.
- Motion — a measured check of the sequence's timing (Motion check).
- The readout — timecode, frame number and zoom, followed by a cheat sheet of the navigation gestures.
Navigating time: the wheel over the ruler scrubs, Alt+wheel or right-drag zooms, Shift+wheel and middle-drag pan, ←/→ step one frame (Shift for ten) when no layer is selected, Home/End jump to the ends, and F fits everything in view while the pointer is over the timeline.
02Animating something
Animation here is one small loop you repeat:
- Put the playhead where you want a pose.
- Set the value — scrub it in the Properties panel, or move the layer on the canvas.
- Click the ◆ badge next to that property to record it.
Do that twice and you have an animation:
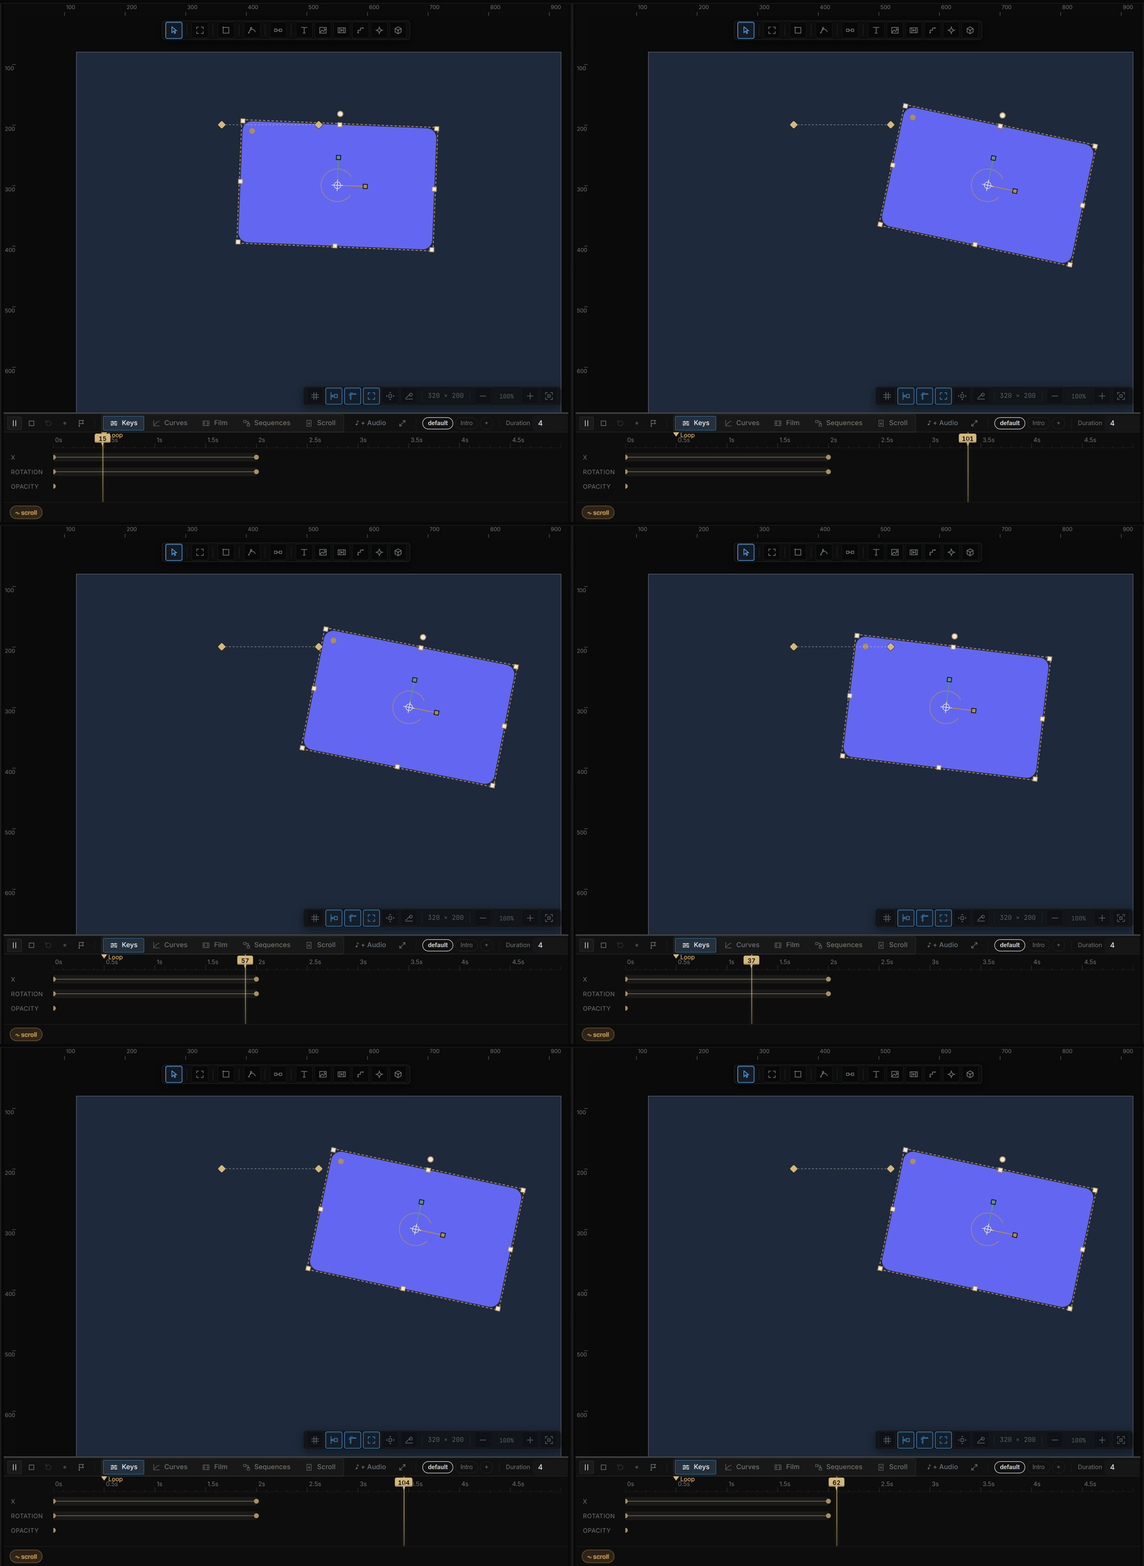
The ◆ badges live in the Properties panel's Motion mode. Switch the Design / Motion control at the top of the panel to Motion to see a badge on every row. In Design mode the panel hides them until a property is actually animated, bound or exposed — so an animated row always keeps its badge.
Once a property is animated its row changes — the value updates as the playhead moves, and ◀ / ▶ next to the badge walk to the previous and next keyframe. Changing an animated value while the playhead is between keys records a new key at the playhead, so an edit never silently disappears on the next frame.
Auto Key
Turn on Auto Key in the transport when you want to pose without clicking badges. Every value you change — in the panel or by dragging on the canvas — becomes a keyframe at the playhead. A toast confirms the switch: Auto Key on — edits become keyframes.
Auto Key is a recording mode for this session only. It is off every time you open the editor, so a forgotten switch never fills a later project with keys. It never records what rules, physics or playback write — only your own edits.
03Keys — the dopesheet
The default view: one row per animated property, one diamond per keyframe, and a segment drawn between them.

- Click a keyframe to select it, drag to move it in time, Delete to remove it.
- Shift+click adds a key to the selection; drag on empty track space draws a box that selects every key inside it (
Shiftto add to what you have). Drag any selected key and the whole group moves. - Alt+drag moves a copy and leaves the original in place.
- Ctrl+C copies the selected keys; Ctrl+V pastes them at the playhead, spacing kept.
- Double-click a row to add a keyframe at the playhead, or click the ◇ at the start of the row.
- Right-click a key for Delete key — or Delete N keys when it is part of a selection.
- While you drag, time snaps to the things that matter: the playhead, markers, keyframes on neighboring rows, and the frame grid. The snap threshold is measured in screen pixels, so it feels the same at every zoom level.
- The segment between two keyframes is drawn with a texture that tells you its easing at a glance — linear, eased, or held.
Rows appear only for properties that actually have keyframes, so the sheet stays as short as your animation is simple.
If you shorten a sequence below its last keys, a ⚠ N keys past the end button appears in the transport. Those keys never play; click the button to extend the sequence so it covers them.
04Animating color
Fill (solid color), Stroke and Shadow › Color carry the same ◆ badge as the number rows: click it to record the color at the playhead, and ◀ / ▶ step between color keys.
In Keys, a color row is drawn as a strip of the real colors it passes through. In-between colors are mixed so that a blue-to-yellow move stays vivid in the middle instead of dropping to grey. Color rows do not appear in Curves — a color has no single value to plot.
A rule can fade a color too: Set Appearance takes a Duration and an Easing. Duration 0 changes the color instantly; above 0 it glides there. It can target Fill, Stroke, Shadow, Gradient start or Gradient end.
05Easing
Easing is what makes motion feel like something rather than a constant slide. A keyframe's easing shapes the segment that leaves it — so to change how a move feels, set the easing on the keyframe it starts from.
The feel bar
Select a keyframe in Keys and a bar appears in the transport: sharp ◂───▸ smooth. Its five stops are Hold (step), Linear, Out Cubic, In-Out Quad and In-Out Sine. Click a stop or drag along the bar; the change is written when you let go. A small curve next to it previews the shape, and the curve button (or right-clicking the bar) opens Curves.
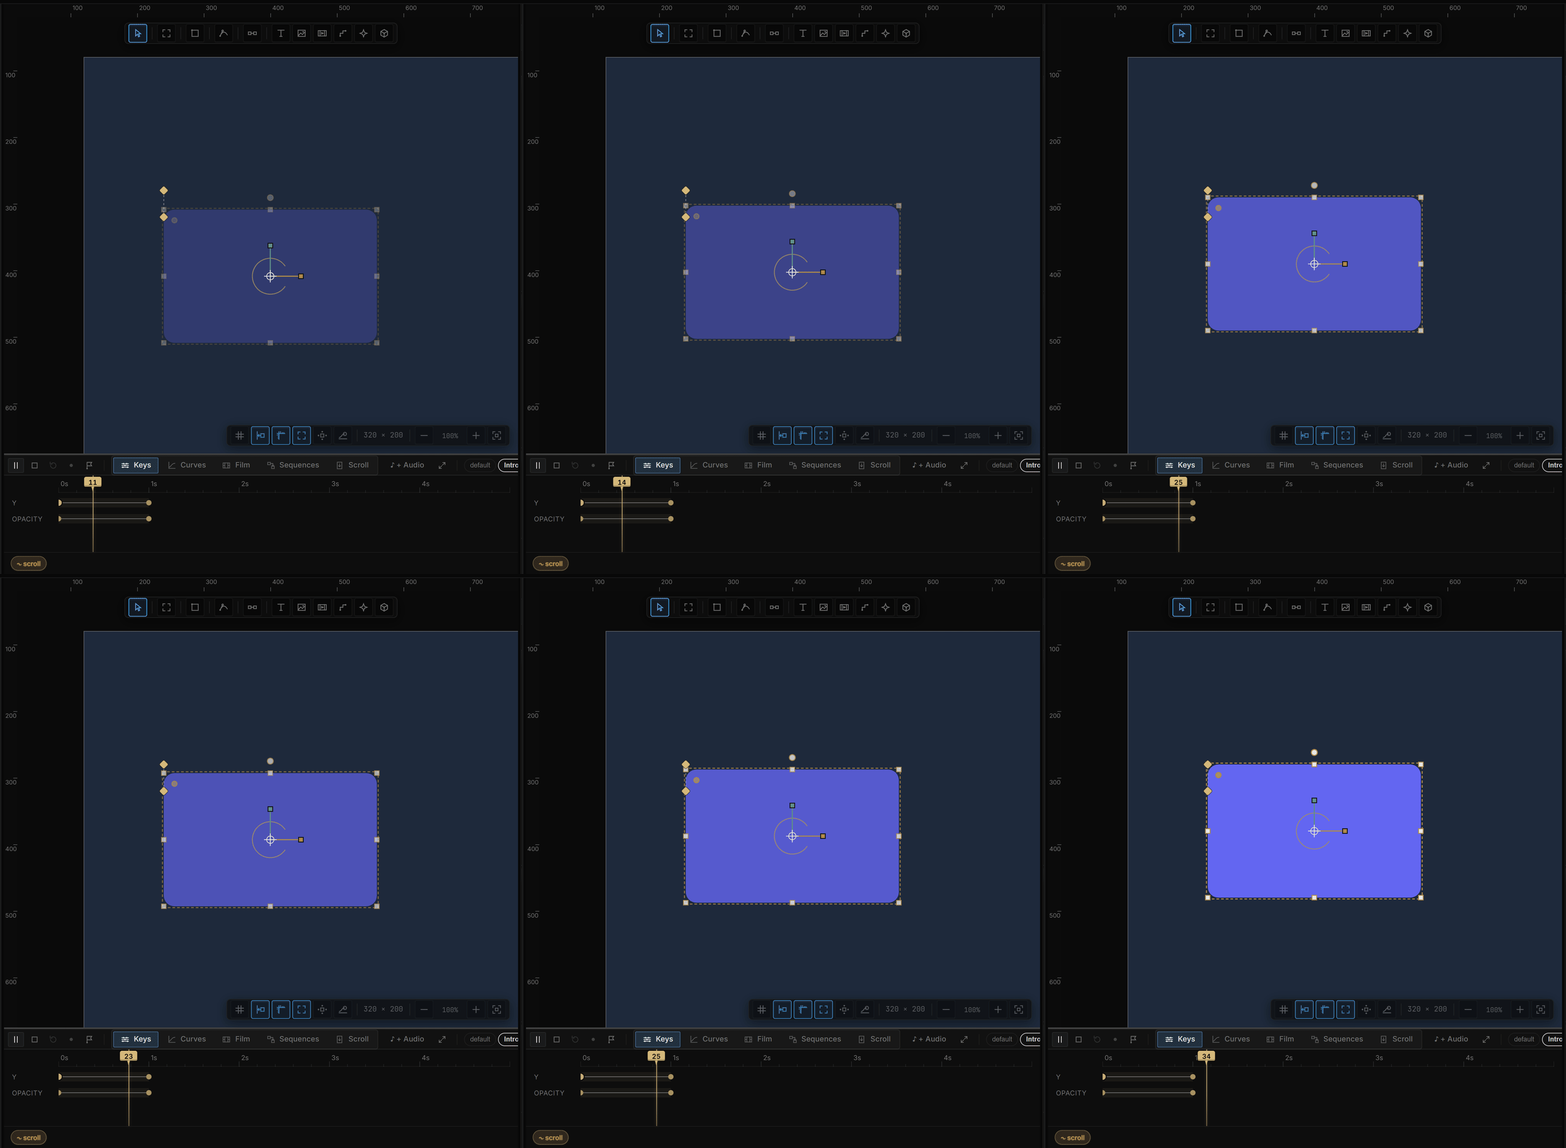
If the key already uses a curve that is not one of the five stops, the bar says custom. On the last key of a row the bar is disabled — there is no segment after it to ease.
The full list
For everything else, right-click a keyframe in Curves. The full family is there: Linear, the In / Out / In-Out pairs of Quad, Cubic, Quart, Quint, Sine, Expo, Circ and Back, plus Bounce and Elastic — and Hold (step), which doesn't interpolate at all. Hold is the right choice for values that can't have an in-between: an image slot can be picture 1 or picture 3, never 2.4.
Right-clicking a badge in the Properties panel offers Next key eases, which sets the easing of the next key you add from there.
06Curves — the graph editor
The dopesheet answers when; the graph editor answers how much. It draws the actual value curves of the selected layer:

- Property chips along the top pick which curve you edit. Shift+click a chip to hide or show its curve.
- Drag a keyframe to change its time and value at once; drag its handles to shape the curve by hand.
Shiftkeeps the time fixed and snaps the handles;Altbreaks a handle pair so each side moves on its own. - Right-click a keyframe for Delete key, Align handles (joins a broken pair back into a smooth tangent) and the full easing list.
- The wheel zooms the value axis, Ctrl+wheel zooms time, and dragging empty space pans. Fit (or F, or double-clicking empty space) fits the value range.
- The readout at the top tells you exactly what you're touching — time, value and easing.
What you see is what plays: the curve is drawn by the same evaluator that runs the animation, so it can't drift out of sync with the result.
07The motion path on the canvas
Select a layer that moves in X and Y and its path is drawn on the canvas:
- The line is where the layer's pivot travels, including every group it sits in — rotated or scaled parents are taken into account.
- Dots mark one frame each. Dots close together are slow, dots far apart are fast, so you can read the easing without opening Curves.
- Ghosts — faint outlines of the layer at each keyframe, with its size, rotation and scale. They appear even when only rotation or scale is animated.
- Diamonds sit on each keyframe along the path.
Drag a diamond to move that keyframe in space — the path reshapes and the key keeps its time and easing. Shift locks the drag to one axis. Alt+drag a diamond to retime it instead: it slides along the path in time and keeps its position. Double-click a diamond to jump the playhead there. A drag that moves both X and Y is one undo step.
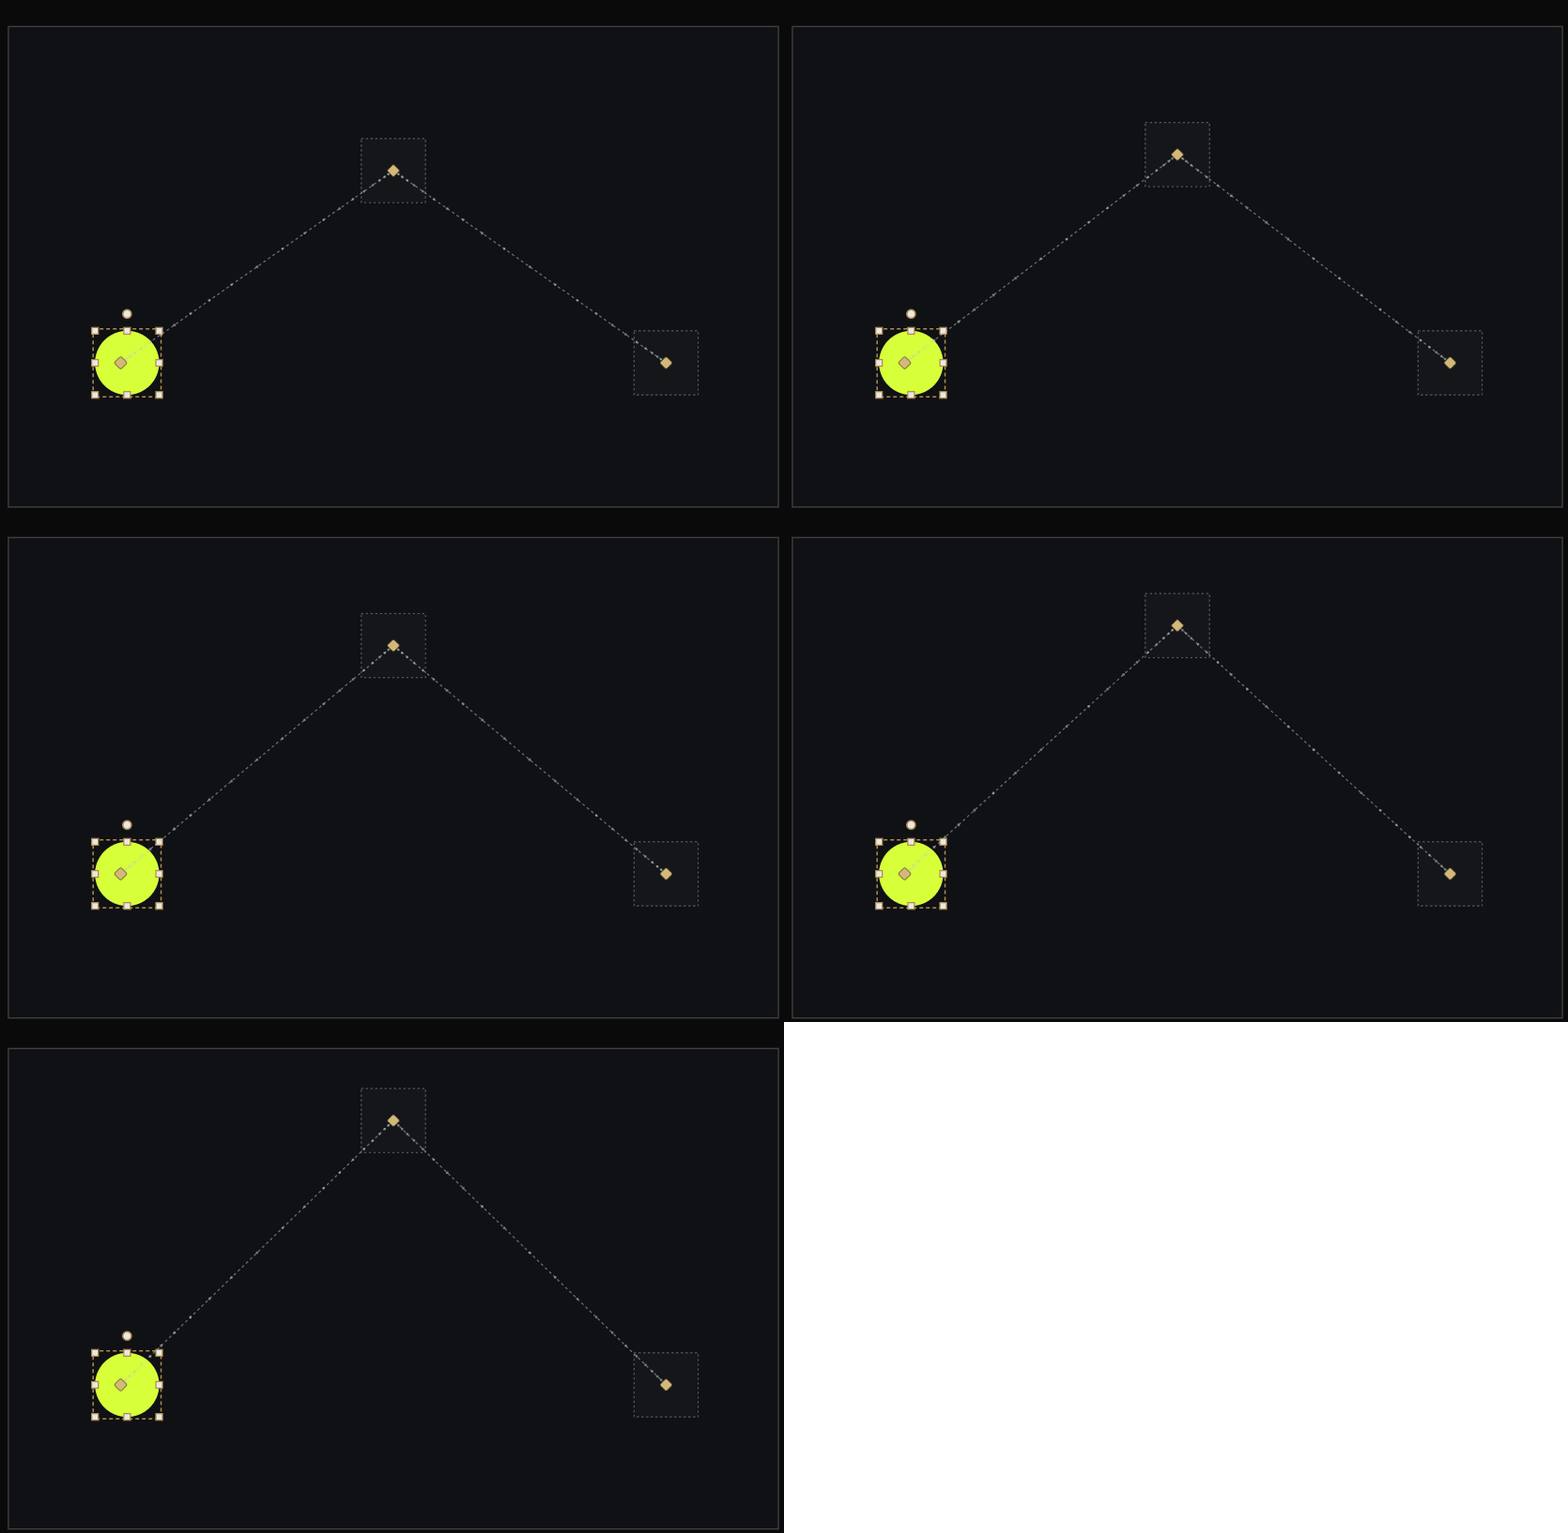
Hover a diamond — the tooltip shows its time and these gestures.
08Motion check
The Motion button in the transport measures the active sequence's timing — staging, easing and pacing — and shows the result on the button: Motion ✓ when nothing stands out, Motion · N when it found N things to look at. It works without AI and does not run while the timeline is playing.
Click it for the card: a one-line summary (how many layers move, the span of the motion, the busiest moment), the issues, the sequence's choreographies, and a Who moves when list. Each issue says what it is and offers Select to pick the layers involved.
| Tag | What it flags |
|---|---|
| Fix · clipped | Something is still moving when the sequence ends — the end is never seen |
| Fix · linear | Arrivals and moves on a Linear curve |
| Fix / Consider · together | Three or more elements start at the same moment instead of being staged |
| Consider · settle | Four or more elements come to rest on the same frame |
| Consider · samey | Most elements enter the same way, so nothing reads as the hero |
| Consider · tooFast | A big move in a blink — reads as a jump |
| Consider · tooSlow | A long fade with nothing else moving — reads as loading |
| Consider · diagonal | A layer moves on X and Y at once |
| Consider · dead | Nothing moves for more than 600 ms |
| Note · mechanical | Many elements share exactly the same duration, ease and spacing |
| Note · idleTail | The sequence runs well past its last motion |
A deliberate wave — a stagger from the center, the edges, at random or by grid distance — is recognised as one gesture and is not flagged as together.
09Markers — the flags on your timeline
Markers are labeled points in time — the beat where something should land, the moment a section ends. Add one at the playhead with the flag button in the transport. Each one belongs to the sequence you added it to.
Working with a flag
Flags live on the ruler, and everything you can do to one is on the flag itself:
| Click | Jump the playhead to it |
| Drag | Move it in time — it snaps to the playhead, to keyframes and to other flags, exactly like dragging a keyframe |
| Right-click | Rename · Go to · Duplicate at playhead · Color · Delete |
| F2 | Rename the selected flag |
| Delete | Remove the selected flag |
| , and . | Walk to the previous / next flag, wrapping around the ends |
The cursor turns into a grab hand when you're over one, so you can tell a flag from the ruler behind it. A short press is still "jump here" — you only start moving it once you actually drag.
Color is yours to use. A flag can be Amber, Red, Green, Blue, Purple or Grey, and the tool never assigns one for you. Six names is enough to build a habit — red for the moments that need fixing, green for the ones that are settled — and few enough that the ruler stays readable.
Names matter more than they look. Rules find a flag by its name, so two flags called the same thing would make the second one unreachable. New flags take the first free number, so deleting M2 and adding another gives you M2 again rather than a second M3.
They earn their keep three ways:
- Keyframes snap to them while you drag, so a move can land exactly on a beat.
- A rule can fire when playback reaches one — the At a time trigger (Interactions).
- A rule can navigate by them. This is the part flags really exist for: instead of hard-coding times in milliseconds, you name moments and then move between them.
What a rule can do with flags
The Sequence Control action offers fifteen commands: five ordinary transport commands, five that are all about flags, and five for running sequences as layers. The flag half:
| Command | What it does |
|---|---|
| Play · Pause · Toggle | Start, stop, or flip the sequence's playback |
| Restart | Back to the beginning and play |
| Seek | Jump to a given time |
| Go to ⚑ | Jump straight to a named flag |
| Play from ⚑ | Start playing at that flag |
| Play until ⚑ | Play and stop when it reaches that flag |
| Next ⚑ | Move to the next flag after the playhead |
| Prev ⚑ | Move to the previous one |
And the settings that shape them:
| Setting | What it does |
|---|---|
| Sequence | Which named timeline the command applies to |
| Start flag (⚑) | Empty means "from wherever the playhead is". Set one, and the rule plays the stretch between the two flags |
| Direction | Only for Play until ⚑ — Forward ▸, ◂ Backward, or Shortest way |
| Speed (×) | Playback rate, 0–8; 1 is normal, and a negative rate plays the sequence backwards |
| Glide (ms) | 0 jumps to the flag instantly; above 0 the playhead eases there |
| Wait for finish | The next step in the rule waits until this one is done |
That combination is what the ready-made Step through flags recipe is built from — each click runs Next ⚑ with a glide, and the arrow keys walk both ways.
10Sequences — more than one timeline
A scene isn't always one continuous animation. A sequence is a named timeline with its own keyframes, markers and duration. Every scene starts with one called default, which can't be deleted; + adds more. A new sequence starts from the pose you are looking at, so nothing jumps.

Switching chips swaps what the timeline is editing. Double-click a chip to rename it.
Right-click a chip — or a node in the Sequences graph — for the rest:
| Rename (F2) | Same as double-clicking |
| Duplicate | A full copy: keyframes, flags, duration and its driver all come along. This is how you make a variant without rebuilding it |
| Dive into | Open that sequence in Keys |
| Move earlier · Move later | Graph only — change the sequence's place in the order |
Delete (Del) | Remove it and everything in it, including its transitions. default can't be deleted, and the menu says so rather than hiding the option |
Deleting is undoable — Ctrl+Z brings the sequence back with its keyframes and flags intact.
Two things worth knowing:
- Each sequence remembers the values a property had before it started animating them, and restores them when you leave. An Intro that fades a card from 0 to 1 won't leave that card invisible in another sequence.
- Sequences are what interaction rules play. "When this is tapped, play *Intro*" is written against the name, so renaming is safe and meaningful names pay off.
11Transitions and the blend graph
The Sequences tab shows every sequence as a node and every transition as a cable between two nodes:

- Click a node to make it the active sequence, double-click to dive into it in Keys (Esc brings you back), right-click for the menu above.
- Drag a node's ⚡ port onto another node to wire a transition — or turn on Wire and drop onto a node. Click a cable to edit it in the panel on the right.
- Arrange lays the nodes out — a ring with four or more, a row otherwise. All variations creates every missing transition in one step; it is disabled when every sequence already reaches every other one.
- A cable's texture tells you its time mode. The legend under the graph decodes it: Crossfade, Sync scrub, Parallel, Page curl.
Each transition carries:
| Field | What it is |
|---|---|
| Name | So rules can call it by name |
| From → To | The two sequences |
| Blend | Duration in ms (step 50, min 0) and easing |
| Time mode | Crossfade (blend) mixes the two poses. Sync scrub (film) scrubs both timelines together. Parallel play runs them at the same time. Page curl turns one over the other |
| Auto on end | Play this transition automatically when the FROM sequence ends |
A new wire starts at 300 ms, easing Linear, Auto on end off, mode Crossfade (blend). Play previews the transition on the canvas.
A scroll handoff is different. If two Scroll sections overlap and each Drives a sequence, the wheel crossfades those films across the shared range — no cable, no Auto on end. That junction and the ⇄ badge are on When two sections overlap.
Moving between artboards rather than sequences — Smart animate, push, slide — is on Screen transitions.
12Playing several sequences at once
Switching sequences is a choice — one is editing, one is playing. But a scene often wants two things happening together: a background that loops forever while a card animates in, a headline that types itself while the page keeps scrolling.
That's what layers are. A layered sequence plays on top of whatever is already running, and doesn't change which sequence you're editing. Ten can run at once.
Layers are driven from rules (Interactions), through the same Sequence Control action:
| Command | What it does |
|---|---|
| Play together ⧉ | Start this sequence alongside the others |
| Stop this layer | Take it out; the properties it was driving go back to where they rested |
| Set layer time | Put its playhead at a time or a flag and hold it there |
| Layer weight | How much of it applies, 0 → 1 |
| Drive layer ∿ | Hand its playhead to scroll, a signal or a variable |
Weight is how you blend
Layer weight is the dial between "this sequence has no effect" (0) and "full effect" (1). Because it accepts a stream, not just a number, you can hand it to scroll or to audio and watch a sequence fade in and out live — no transition to set up, no graph to wire.
When two sequences move the same thing
Sooner or later two layers reach for the same property. You choose what that means:
- Override (the default) — the last layer to run wins. If your layers touch different artboards this never comes up.
- Additive — their offsets add together. Two sequences that each nudge a card 100px to the right move it 200px. This is the one that matches what people picture when they say "run them both".
Colors blend too: under Additive two color changes mix by weight rather than adding up.
Layers versus transitions
Both involve two sequences, and they answer different questions:
- A transition takes you from one sequence to another — a crossfade, a page curl. One thing is playing when it's done.
- A layer keeps both playing. Nothing is replaced.
Reach for a transition when a sequence is a state, and for a layer when it's an ingredient.
13Letting scroll drive a sequence
A sequence doesn't have to run on the clock. Three ways to hand its playhead to a 0 → 1 source:
| From | What you do |
|---|---|
| Sentences | Whole scene → Scene → ∿ Drive — pick the sequence. Default source is the first artboard's Scroll progress (Y) |
| Timeline | Drag a sequence chip onto the playhead |
| Artboard | Add an interaction on the artboard and pick Drive sequence from scroll under ∿ Bindings — offered only when its content is taller than the frame. Drives the active sequence (or the first) from that artboard's scroll Y |
Only the active sequence's driver runs. The row shows not active otherwise. ⇥ on the Drive row claims the playhead when that sequence's range is entered. The source is always read as 0 → 1 (start → end). Transform is the same chain as a bind.
A layered sequence can be driven the same way with Drive layer ∿, so several sequences each follow their own stretch of scroll at the same time.
An artboard can also own a page playhead — its subtree at its own length, without switching sequences. That, the ⇥ switch, and the Scene group are on Interactions.
14Shortcut recap
| Transport | Space play/pause · ←/→ step a frame (Shift ×10, nothing selected) · Home/End jump · F fit (pointer over the timeline) |
| Zoom & pan | wheel = scrub ruler · Alt+wheel or right-drag = zoom · Shift+wheel or middle-drag = pan |
| Keyframes | ◆ badge = add at playhead · double-click a row = add · drag = move · Shift+click / box = select more · Alt+drag = copy · Ctrl+C / Ctrl+V = copy / paste at playhead · Delete = remove |
| Easing | feel bar = five stops · right-click in Curves = full list |
| Curves | wheel = value zoom · Ctrl+wheel = time zoom · Shift = snap · Alt = break handles · F = fit values |
| Motion path | drag a diamond = move the key · Shift = one axis · Alt+drag = retime · double-click = go to key |
| Flags | flag button = add · drag = move · , / . = previous / next · F2 = rename · Delete = remove · right-click = everything else |
| Sequences | click a chip = switch · double-click = rename · right-click = duplicate / delete · + = new · Esc = back to the Sequences graph |