Lights are layers inside a 3D scene: you select them, move them with the gizmo, keyframe their intensity and see them in the layer tree. The scene's Environment section sets everything that is not a light — background, fog, reflections, and the render features that make a scene look photographic. Start with Scenes & the camera if you have not drawn a scene yet.
01Quick tour
- Select the scene and click Presets in the canvas toolbar → Three-point. Three lights named key, fill and rim appear under the scene in the layer tree.
- Select key. Its Light section shows Type: Spot, Color, Intensity, the cone settings and Cast shadow.
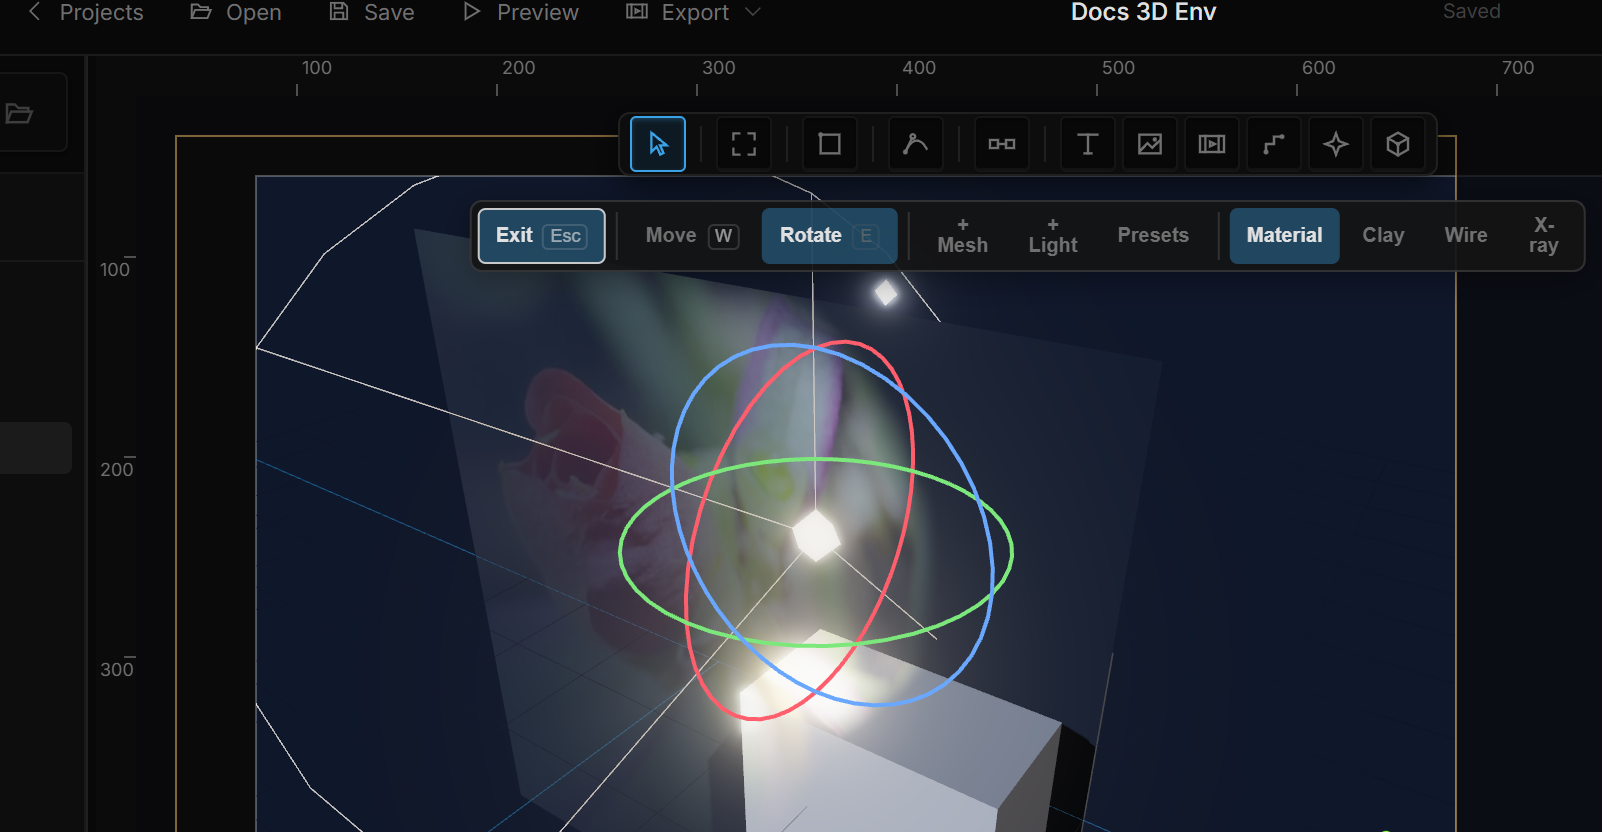
- Press E (Rotate) and drag a ring on the canvas — a light points along its own axis, so rotating it aims it. Scale does not exist for lights.
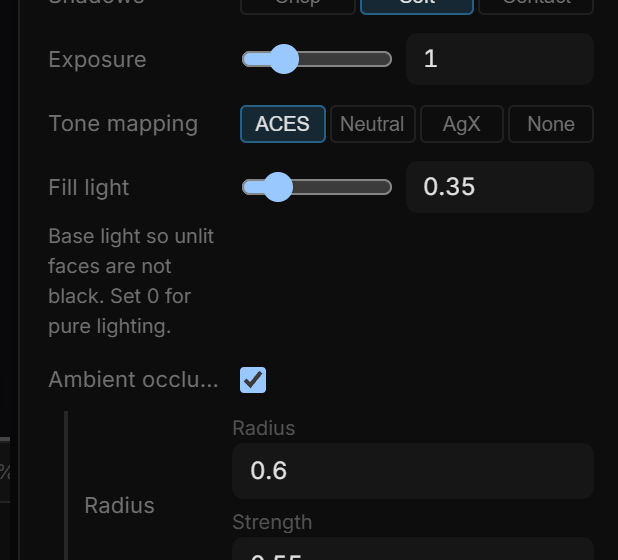
- Select the scene again and open Environment. Set Shadows to Soft, turn on Ambient occlusion.
02Light types
+ Light in the toolbar offers eight types. Hover each for its description. Right-click Add › Light here drops a Point light at the 3D pointer instead — then change Type in the section. The row is greyed unless a 3D scene (or something inside it) is selected; see Mesh here and Light here.
| Type | What it is | Default Intensity |
|---|---|---|
| Directional | Parallel rays from infinitely far away (the sun). Direction comes from the light's rotation. | 2.5 |
| Point | A bulb radiating in every direction. | 80 |
| Spot | A cone-shaped stage light. A Projection (gobo) lights the cone — it does not stamp mesh color. | 90 |
| Ambient | Directionless overall fill. Casts no shadows. | 1.5 |
| Hemisphere | Two-color sky / ground ambient. | 1.5 |
| Area | A rectangular softbox — soft edges, no shadows. | 8 |
| HDRI | A panorama that lights the scene; reflections on metal and glass depend on it. | 1 |
| Projector | Stamps an image onto mesh faces in its frustum. Does not light the scene. | 100 |
Intensities use physical units, so the numbers differ a lot between types. When you change Type, the intensity is moved to the new type's scale so the scene does not go black.
03The Light section
| Row | Types | Notes |
|---|---|---|
| Type | all | Switch the light kind. |
| Color | all but HDRI | Hemisphere shows a second swatch: the ground color bouncing up from below. |
| Intensity | all | A property — keyframe it, bind it to audio level, drive it from a rule. On a Projector this is stamp strength (0–100 %), not illumination. Default 100. |
| Distance | Point, Spot | How far the light reaches (0 = unlimited). |
| Range | Projector | How far the stamp reaches. Default 8. 0 = 40 units. |
| Decay | Point, Spot | Falloff over distance; physically correct is 2. |
| Cone Angle | Spot | Half-angle of the cone in degrees (1 – 89). Default 30. |
| FOV | Projector | Half-angle of the projection in degrees (1 – 89). Default 22. Full vertical FOV is twice this. |
| Penumbra | Spot | Softness of the cone edge (0 – 1). Default 0.3. |
| Soft edge | Projector | Feather on the stamp edge (0 – 1). Default 0.12. |
| Width / Height | Area | Size of the panel in world units. |
| Panorama | HDRI | An equirectangular .hdr / .exr from the library (+ File, URL…, or drop a file). |
| As Background | HDRI | Also show the panorama behind the scene. |
Projection (Spot only)
A spot can throw an image from its cone — a gobo. The Projection sub-block has Source: — none —, Image, Video or Layer. Image and Video add a File row; Layer adds a Layer dropdown so any 2D layer's drawing becomes the projected picture. The sources are the same ones a material texture can use.
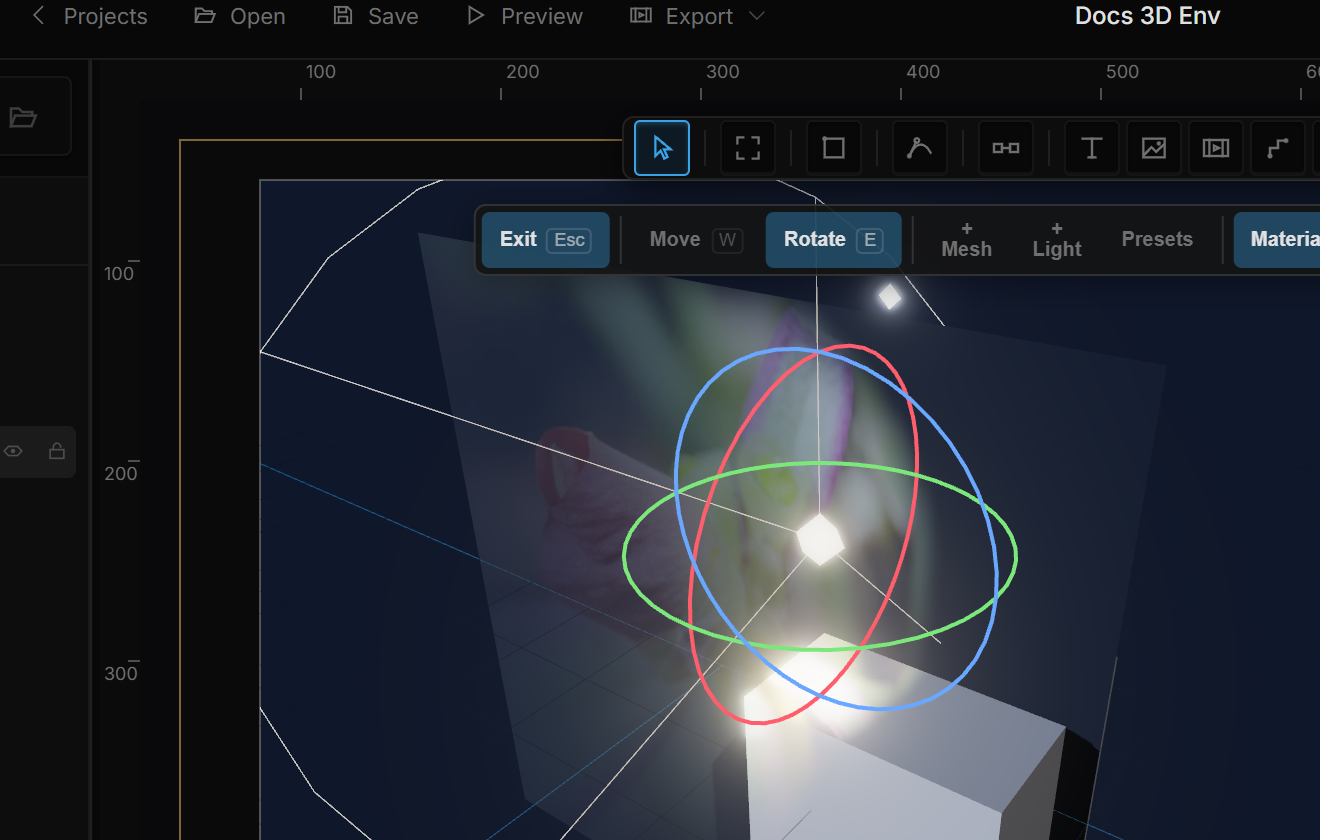
A gobo lights the cone. To stamp a picture onto mesh color — and keep it after you move the light — use a Projector.
Projector
A Projector throws an image at meshes the way a real lamp throws a slide: only faces inside its frustum, facing it, receive the stamp. It does not light the scene and it does not cast shadows. Rotate it with E — it aims along its own axis, like a Spot.
This is not a material's Camera projection — that is on Materials.
Stamp
The Stamp sub-block has the same Source as a Spot gobo: — none —, Image, Video or Layer. Image and Video add a File row; Layer adds a Layer dropdown. Until a source is picked, a hint under the block says the stamp hits every mesh in the frustum and Intensity is stamp strength.
| Row | Values | Notes |
|---|---|---|
| Receivers | All meshes · Choose | Default is every mesh in this scene. Choose lists the meshes; tick the ones that should receive. With nothing ticked, nobody is stamped — live or bake. |
| Bake | Bake stamp · Clear baked | See below. Bake stamp is disabled until a source is picked. Clear baked is disabled until something has been baked. |
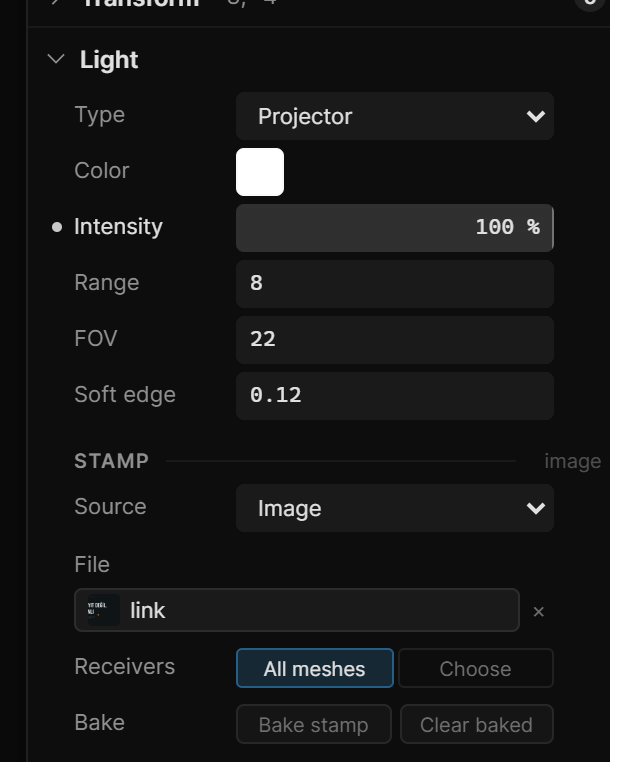
Up to four Projectors can stamp live at once. Where they overlap, later ones draw on top. Hide or delete extras if a fifth does nothing.
Clones of a mesh share the host's stamp. Back faces are skipped. A 1 % Intensity is almost invisible — leave it at 100 for a full stamp.
Bake stamp
Bake stamp writes the live frustum onto each receiver so the picture stays on that face after you move the projector.
- Aim at a face. Set Receivers (All, or tick the mesh). Intensity at 100.
- Click Bake stamp.
- Rotate the projector (E) onto another face. Bake again.
On a cube, each face keeps its own stamp — the second bake does not wipe the first. The live preview stays after a bake until you move or hide the projector, so the two look the same until then.
Clear baked on the Projector removes the baked stamps from its receivers. The live stamp is unchanged. A mesh that has a bake also shows Baked stamp → Clear baked in its Geometry / Model / 3D Text section — that clears only that mesh.
Ctrl+Z undoes a bake. The bake is saved with the project.
Shadows on a light
Only Directional, Point and Spot cast shadows. Their Cast shadow toggle is on by default; ▸ More under it holds the fine-tuning:
| Row | Notes |
|---|---|
| Shadow Map | 512 · 1024 · 2048 · 4096 — sharper but costlier. Default 1024. |
| Softness | Edge blur (0 – 16). Takes full effect when the scene's Shadows mode is Soft; Crisp ignores it. |
| Bias → Depth | Fixes shadow acne (striping on surfaces). |
| Bias → Normal | Offset along the surface — reduces the gap between an object and its shadow. |
An Area light shows a note instead: it cannot cast shadows (an engine limit). Pair it with a Spot and the scene's Contact shadow mode for a soft look with shadows. A Point light warns you when the scene is in Soft mode — point shadows do not render there; use Contact or Crisp.
04Light presets
Presets in the canvas toolbar replaces the scene's current lights with a named setup in one undo step. An HDRI or Projector is kept.
| Preset | Setup |
|---|---|
| Three-point | Spot key + directional fill + directional rim — the classic portrait / product setup. |
| Studio | Two soft area panels + gentle ambient — even, shadow-light product look. |
| Sunset | Low warm sun + violet sky bounce (directional + hemisphere). |
| Night | Dim blue moonlight + ambient + a warm point accent. |
The lights are ordinary layers afterwards — move, recolor or delete them one by one.
05The Environment section
Select the scene. Environment has two sub-blocks: Look (how the scene reads) and Render quality (how expensive and realistic it is). Each feature is a toggle that opens its settings underneath.
Look
| Row | Values | Notes |
|---|---|---|
| Background | Clear · Fill | Clear is fully transparent — layers behind the scene show through. Fill paints the scene layer's own fill (color, gradient or image) behind the 3D content; the fill widget appears below. |
| Harmony | on / off | Blend with the canvas: glass and transmission refract the 2D layers behind the scene. Costs a capture every frame — turn it off if playback slows down. |
| Fog | Off · Linear · Soft | Melts distant objects into a Color (usually the background). Linear fades between Range → Near and Far; Soft is exponential with a Density. |
| Studio env | on / off | A neutral studio reflection environment, used only when no HDRI or Harmony is active — gives metal and glossy materials something to reflect. It adds light; tame it with Brightness (1 is neutral, 0.3 – 0.6 is a subtle reflection-only feel). Brightness also scales an HDRI. |
Render quality
| Row | Values | Notes |
|---|---|---|
| Shadows | Crisp · Soft · Contact | Crisp is cheapest, hard-edged. Soft blurs uniformly using each light's Softness. Contact is sharp where objects touch and opens with distance — the most photographic. |
| Ambient occlusion | toggle + Radius | Darkens crevices and contact points so a model sits on the floor instead of looking pasted on. Larger radius picks up bigger gaps. |
| Depth of field | toggle | A real lens: everything except a chosen distance blurs. Focus is the sharp distance from the camera — type it, or click ⌖ and then click a surface in the scene to measure it. Blur → Aperture sets how fast things blur away from focus, Max blur caps it. Debug paints the sharp band green (near side orange, far side blue) in the editor only. |
| Global illumination | toggle | Baked light-probe grid: indirect bounce light and color bleeding between surfaces. Re-bakes itself shortly after the scene changes. Quality → Probes per axis (6 is a good default), Bounces (1 gives visible color bleed). Show probes draws the probe spheres in the editor. |
| Bloom (HDR) | toggle | Real HDR glow on bright and emissive surfaces. Glow → Strength and Threshold (how bright a pixel must be to bloom, 0 – 1). |
06Shortcut recap
| Shortcut | Does |
|---|---|
| W / E | Move / Rotate the selected light (rotation aims it) |
| F | Frame the selected light with the scene camera |